
CNC PCB Mill Training
There are a number of things that must all align throughout the tool chain to successfully cut a board. Especially important are the origins and units.
Set Origin
Section titled “Set Origin”Set an “origin point for drill and place files” on the bottom, left pcb extent and check “use auxiliary axis as origin” in the plot options:
- Place / Grid Origin

- Place / Drill and Place Offset

Plot Gerber Files
Section titled “Plot Gerber Files”- File / Plot
- Layers
- F.Cu
- B.Cu
- Edge.cuts
- Options

- Plot
- Generate Drill File
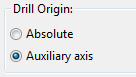
- Drill File
- Layers
FlatCAM
Section titled “FlatCAM”- File -> Open Gerber: Open back and front copper
- Switch from in to mm
- Options tab -> Project Options (drop down)
- Units: mm
- Tool Dia: 0.120mm (v-engraver @ -0.0508mm depth)
- Options tab -> Project Options (drop down)
V-Engraver cut width vs. depth: Tool Width Calculator
Mirror 2-sided
Section titled “Mirror 2-sided”FlatCam Manual: 4.3. 2-side PCB
- Tool -> Double Sided PCB Tool
- Select bottom copper .gbr file
- Mirror Axis: X
- Axis Location: point
- Point/Box: (0,45) (for 100mm tall board) (
 need to subtract the y axis margin)
- (board height - y-axis margin) / 2
- Mirror Object
Create G-Code for Front Copper
Section titled “Create G-Code for Front Copper”FlatCam Manual: 4.1. Isolation Routing
- Project tab -> select the front copper .gbr file
- View -> Disable all plots but this one
- Selected tab -> Isolation Routing
- Tool Diameter: 0.120mm (v-engraver @ -0.0508mm depth)
- Generate Geometry
- Project tab -> select the .gbr_iso file
- Selected tab —> Create CNC Job
- Feed Rate: 60
- Generate
- Project tab -> select the .gbr_iso_cnc file
- Selected tab -> Export G-Code
- Export G-Code
Create G-Code for Back Copper
Section titled “Create G-Code for Back Copper”- Project tab -> select the back copper .gbr file
- View -> Enable all plots
- View -> Disable all plots but this one
- Repeat Isolation Routing, Create CNC job, and Export G-Code for back copper
Create G-Code for Each Drill Job
Section titled “Create G-Code for Each Drill Job”- File -> Open Excellon: Open drill file
- Project tab -> select the drill file
- View -> Enable all plots
- View -> Disable all plots but this one
- Selected tab -> Plot Options
- Select all tools
- Selected tab -> Create CNC Job
- Cut Z: -2.54
- Travel Z: 2.54
- Feed Rate: 76.2
- Tool Change: enabled
- Tool Change Z: 25.4mm
- Generate
- Project tab -> select the .drl_cnc file
- Selected tab -> Export G-Code
- Export G-Code
Create G-Code for Board Cutout
Section titled “Create G-Code for Board Cutout”- File -> Open Gerber: Open edge cuts file
- Project tab -> select the edge cuts file
- View -> Enable all plots
- View -> Disable all plots but this one
- Selected tab -> Bounding Box
- Generate Geometry
- Project tab -> select the .gbr_bbox file
- Selected tab -> Create CNC Job
- Cut Z: -2.54
- Travel Z: 2.54
- Feed Rate: 40
- Tool Dia: 0.50
- Generate
- Project tab -> select the .gbr_bbox_cnc file
- Selected tab -> Export G-Code
- Export G-Code
Chilipeppr
Section titled “Chilipeppr”Load the G-Code File
Section titled “Load the G-Code File”- Drag-n-drop into window
Auto Zero
Section titled “Auto Zero”- Set coordinate system to mm in Axes widget
- Home Machine ( all axes)
- Open auto-level widget
- Steps every 10mm;
- Start at: 0,0
- End at: 50,50; Make sure probe area exceeds board area
- Clearance Height: 2.0mm
- Start Probing at: 1.5mm
- Probe Feedrate: 25
- Max negative Z: -1.5mm
- Place z axis just above work piece (-33mm)
- Zero the “machine” z axis
- Make sure the probe wires are connected
- Go to 0,0
- First use “Run Test Probe” to probe the first point and find the board top
- Zero the “machine” z axis
- Click the VCR “run” button
- Post-Run tab -> Send Auto-Leveled Gcode to Workspace
Note: Do not use “send Auto-Leveled Gcode to Workspace” more than once; it will double or triple the adjustment
Cut the File
Section titled “Cut the File”- Remove probe wires
- Raise(+) z-axis 2 mm
- Go to 0,0
- Start spindle motor
- Click run VCR button in “Gcode” widget
Migrated from the legacy DMS wiki: original page